What is ColorStacking?
ColorStacking is a multi-color 3D printing technique that produces vivid, tattoo-inspired art with no paint, no post-processing, and no brushwork. Created by Unicorn Graveyard, it's the signature technique behind the majority of the collection — born from a happy accident with a Jason mask that turned into something much bigger.
How It Works
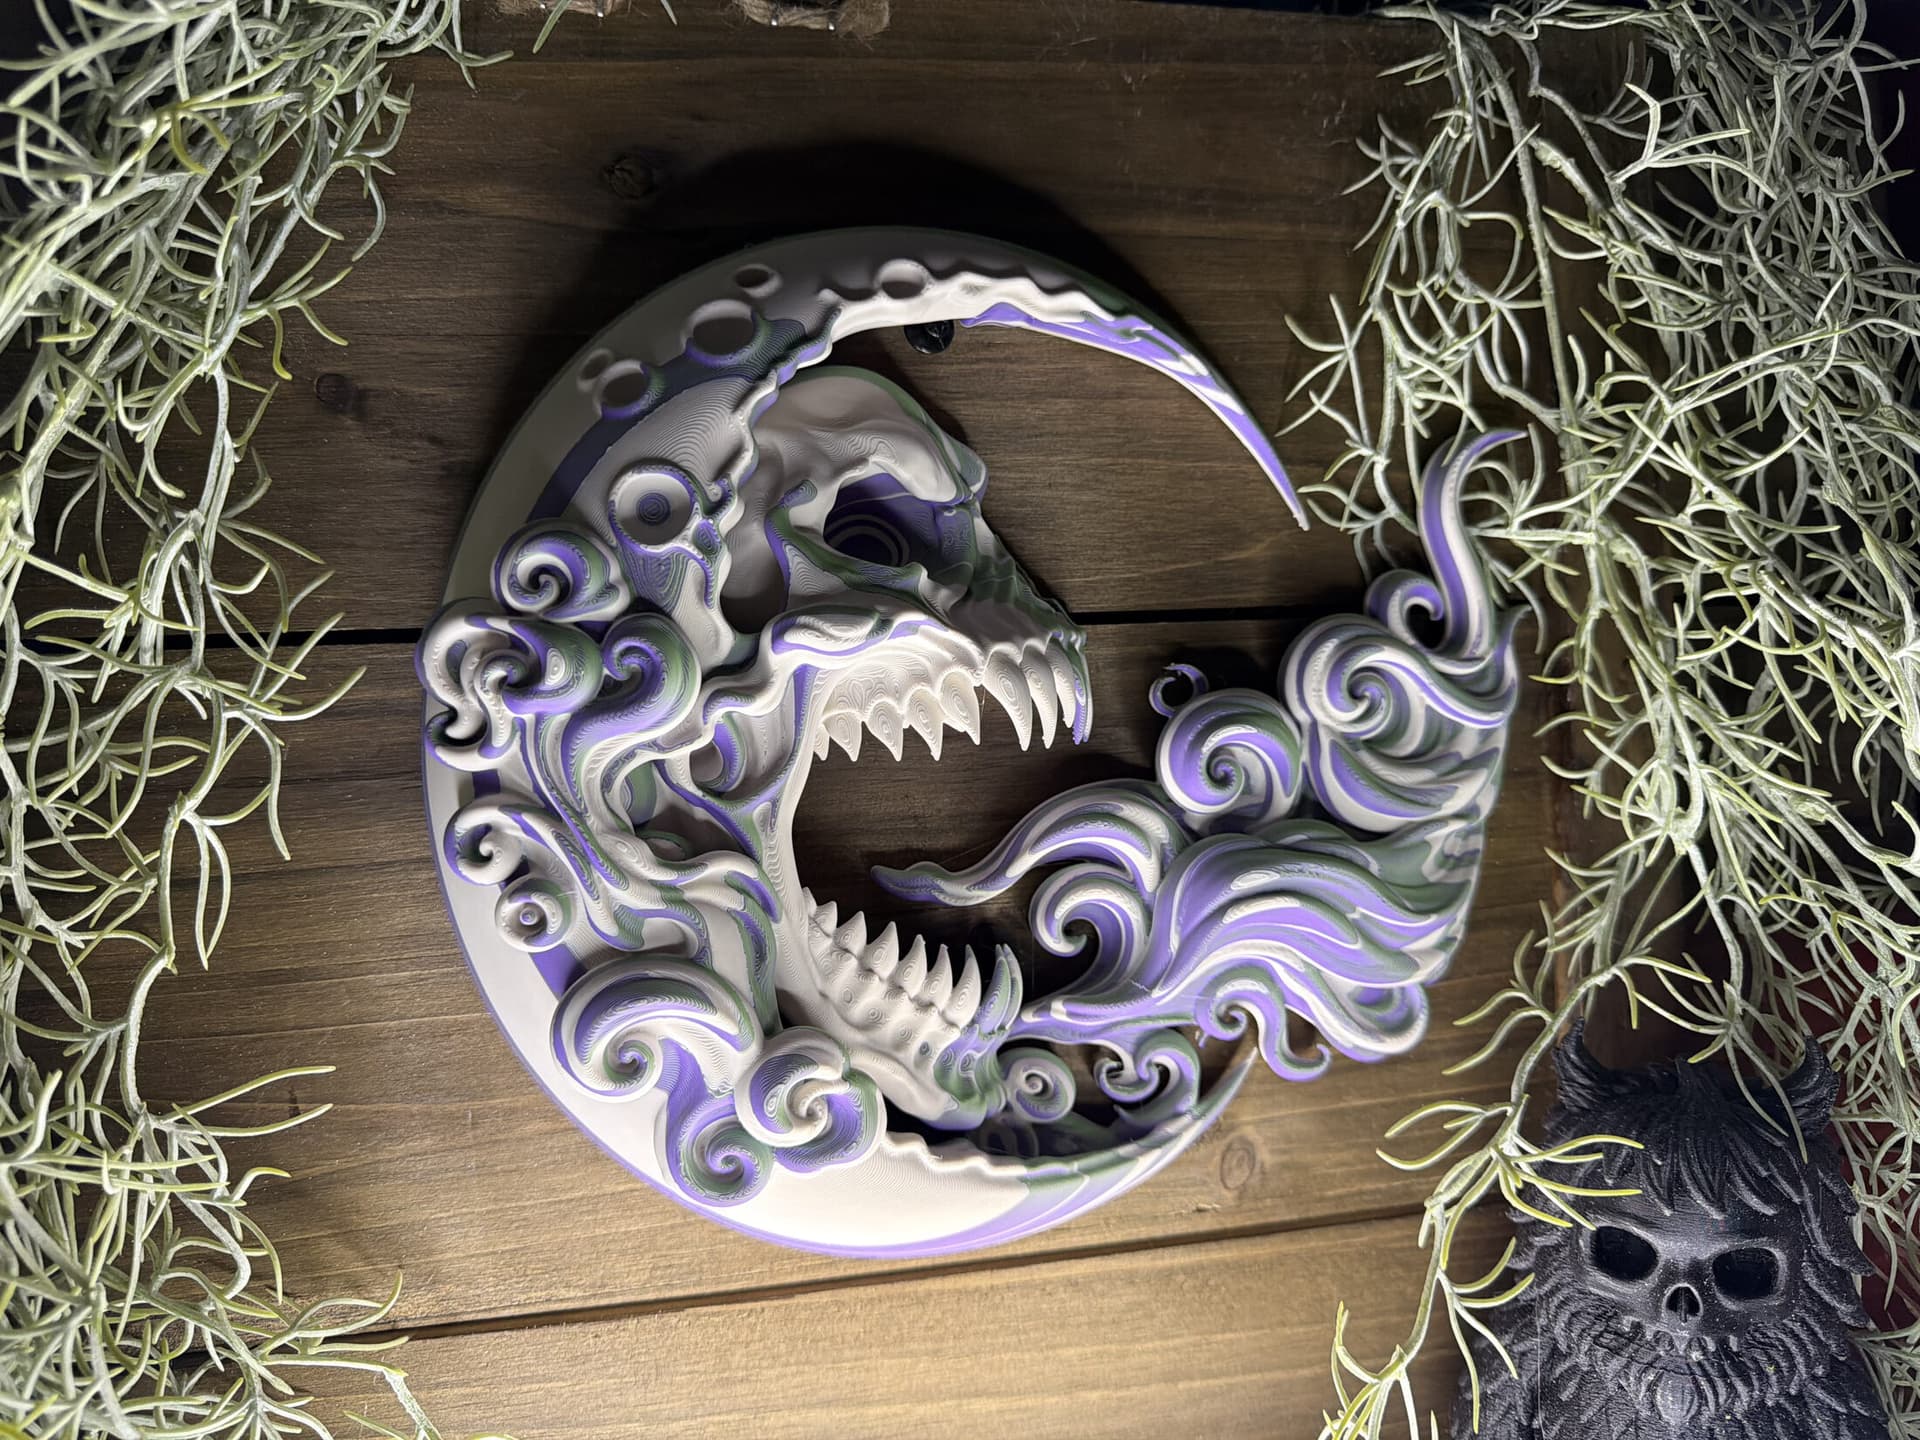
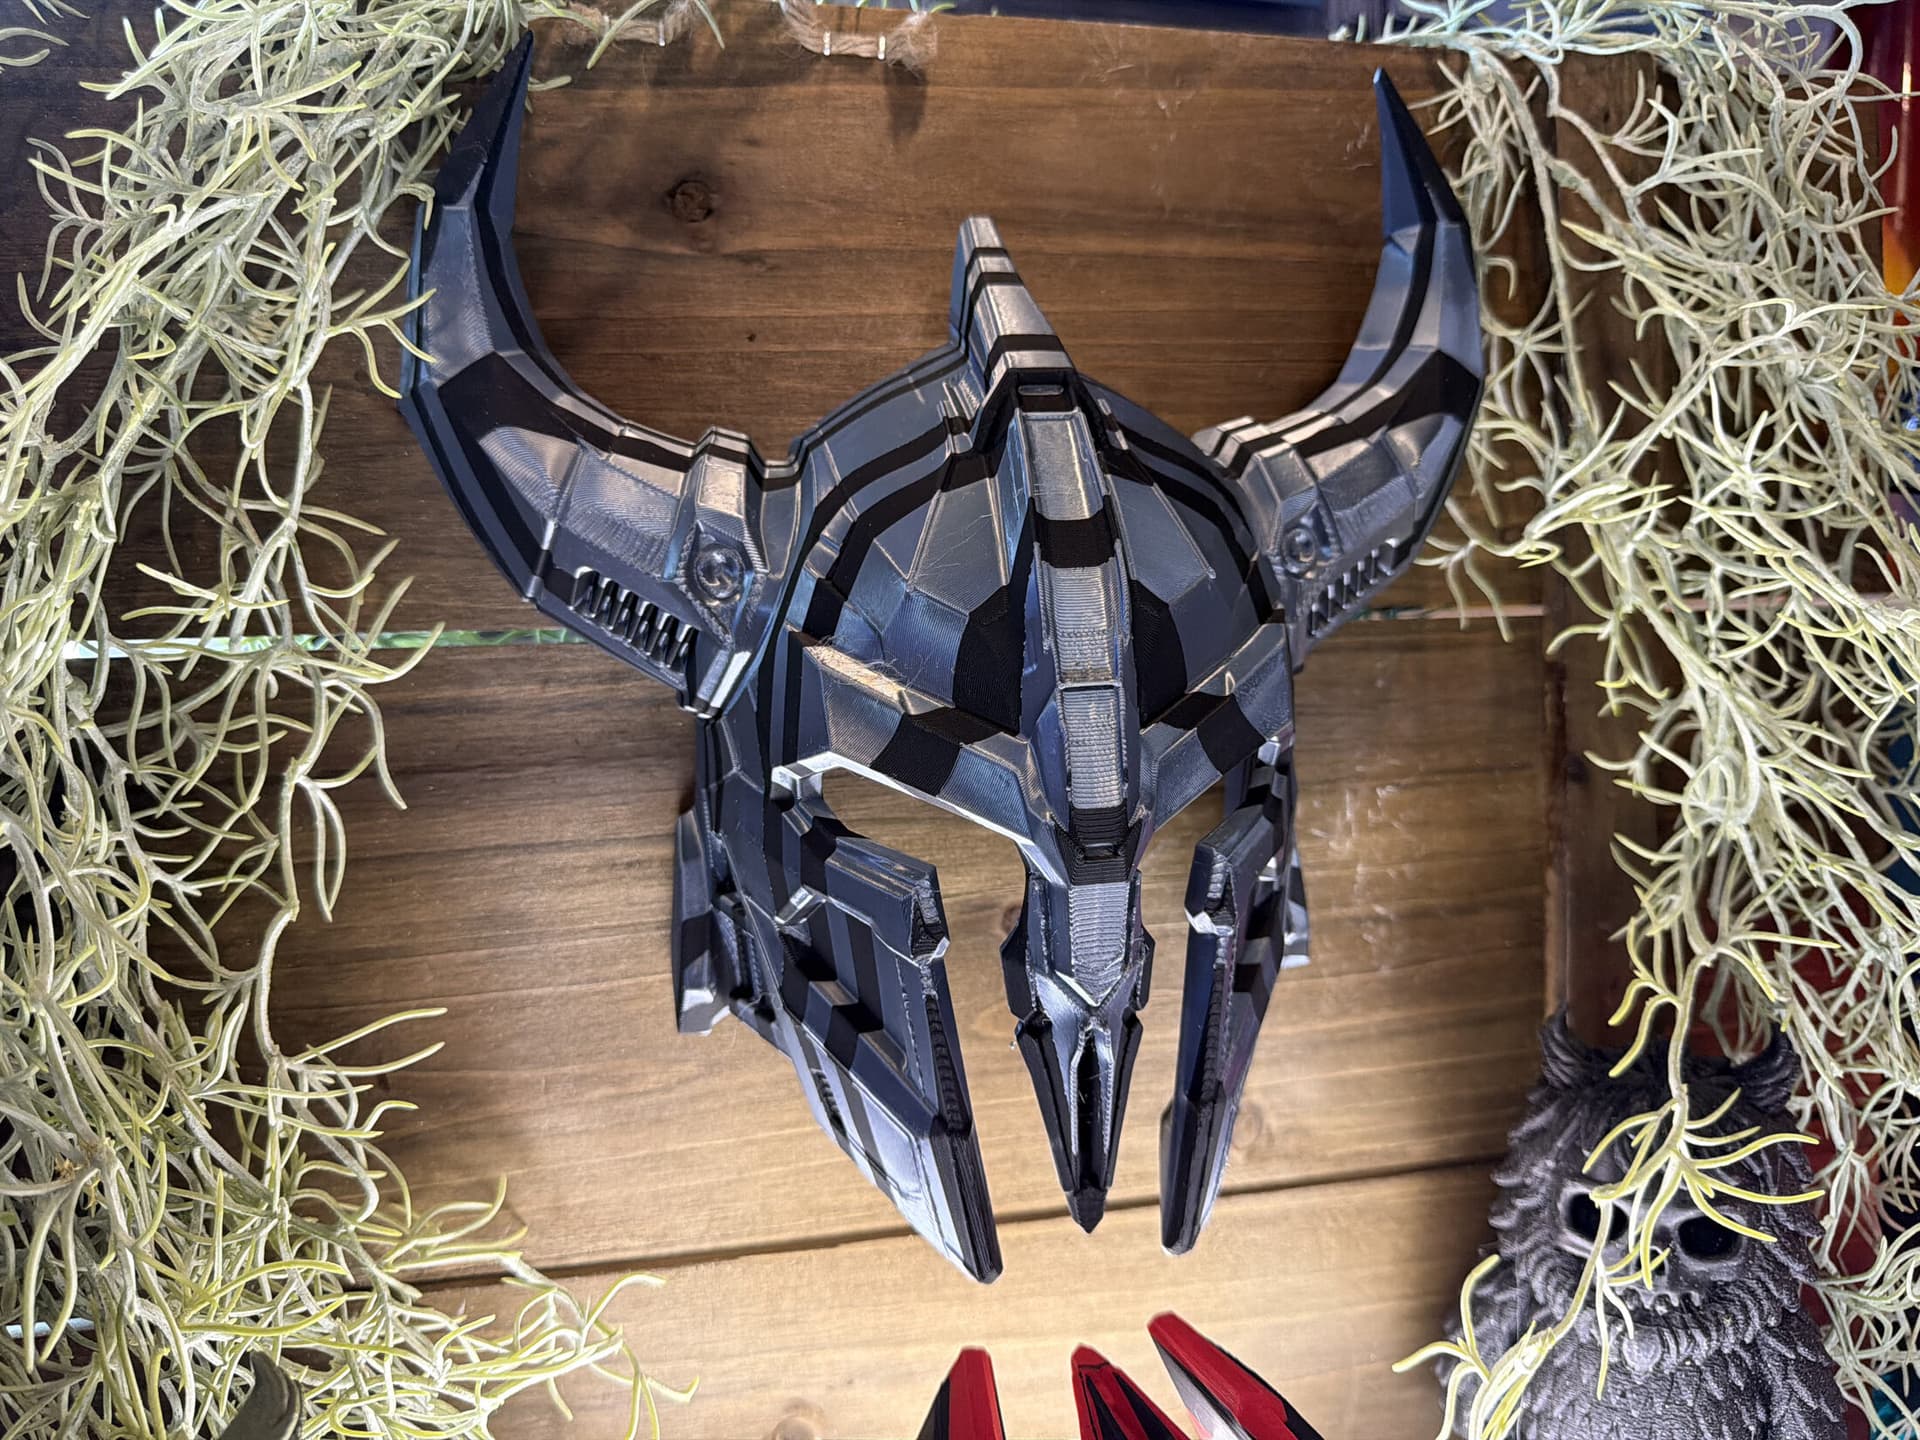
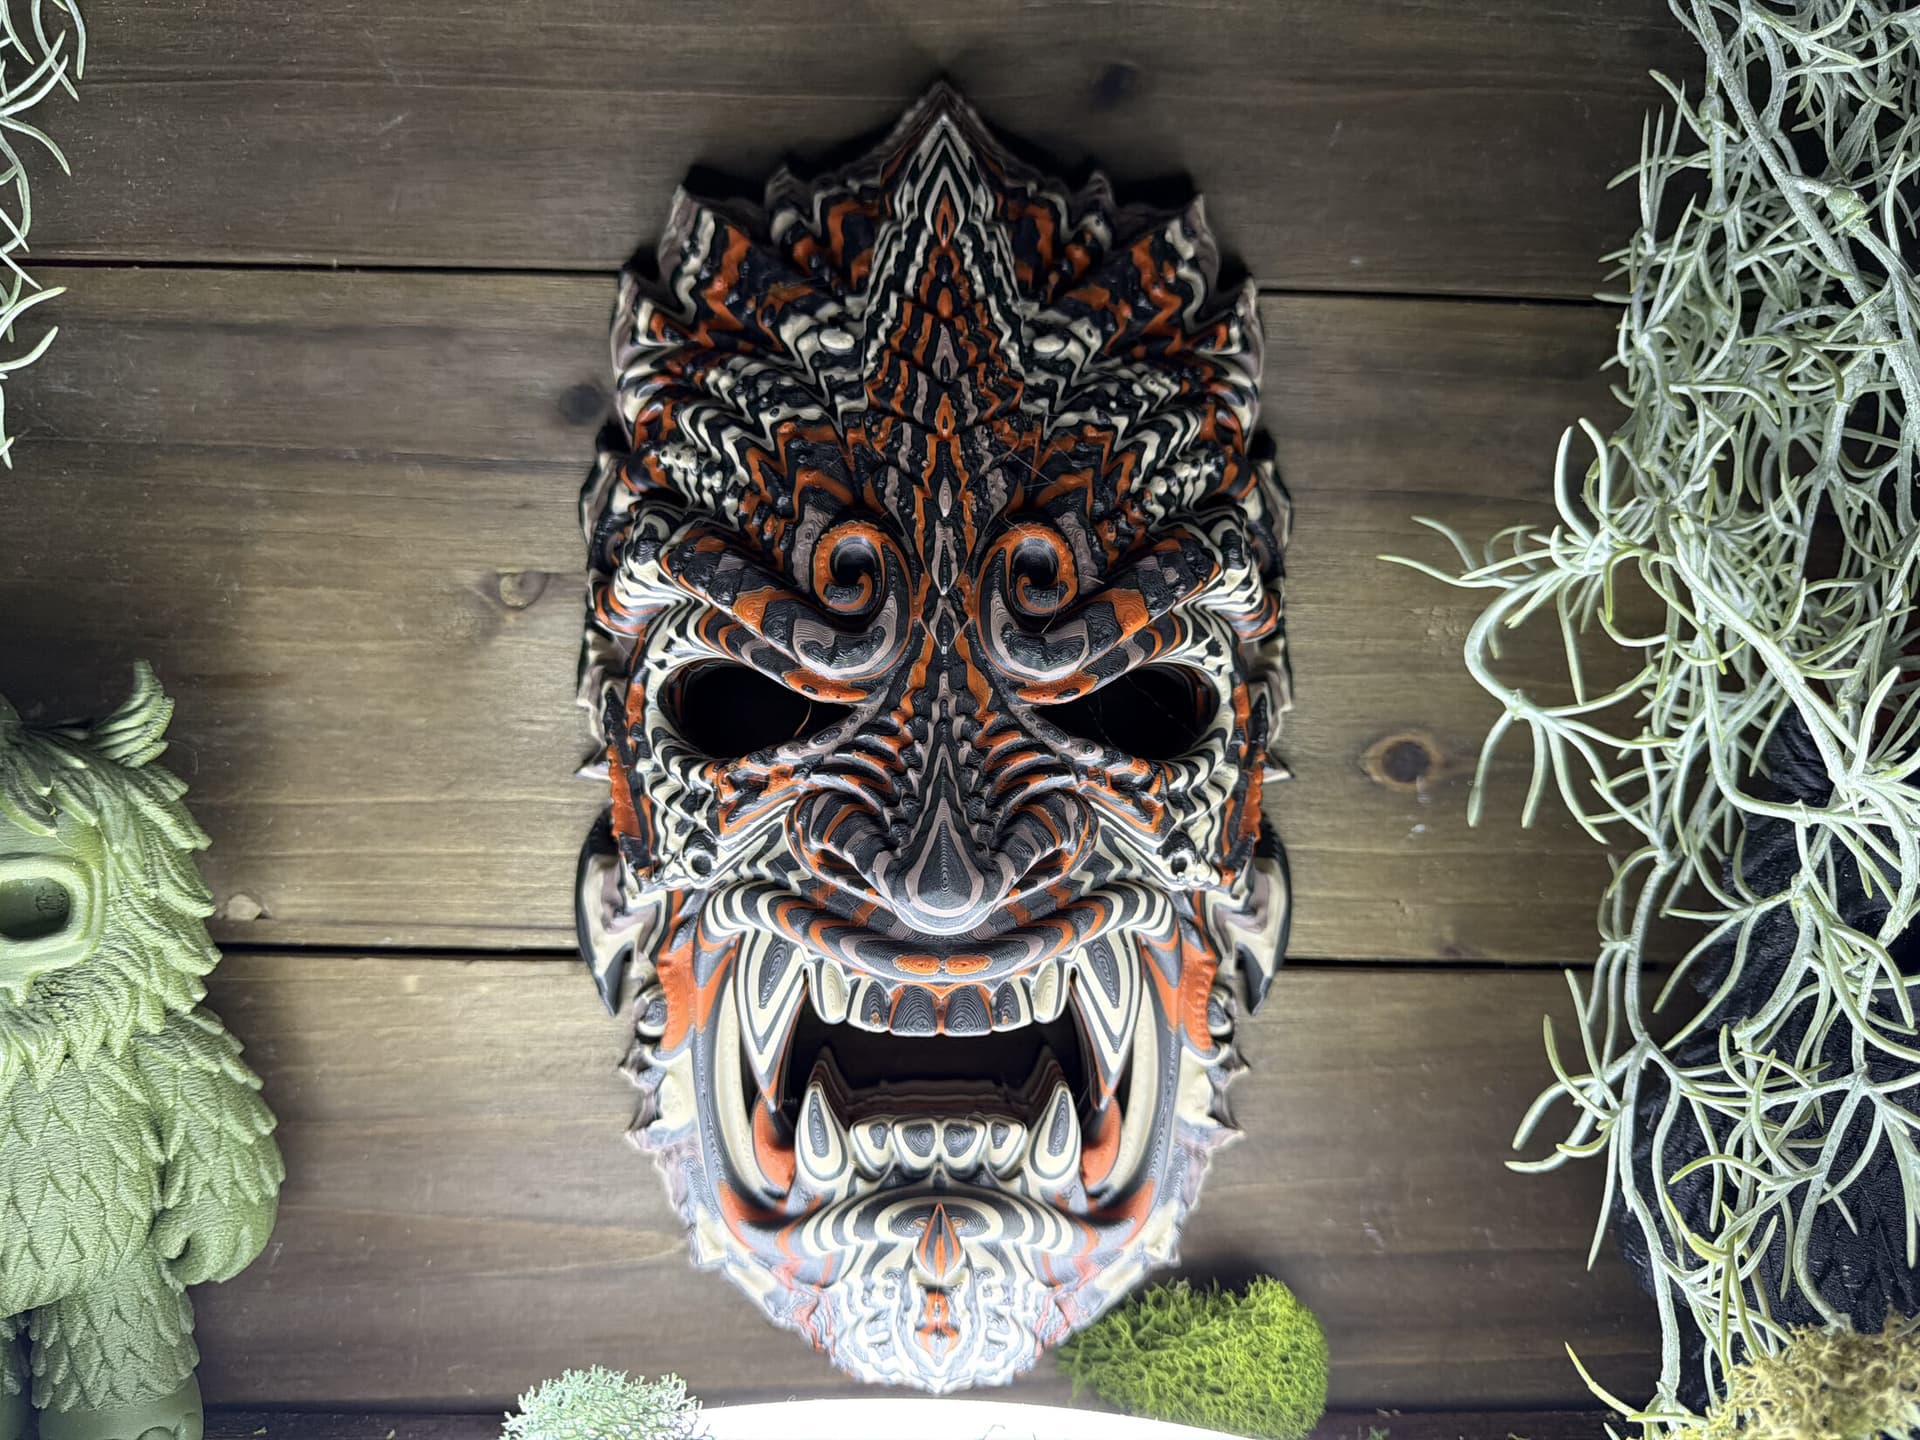
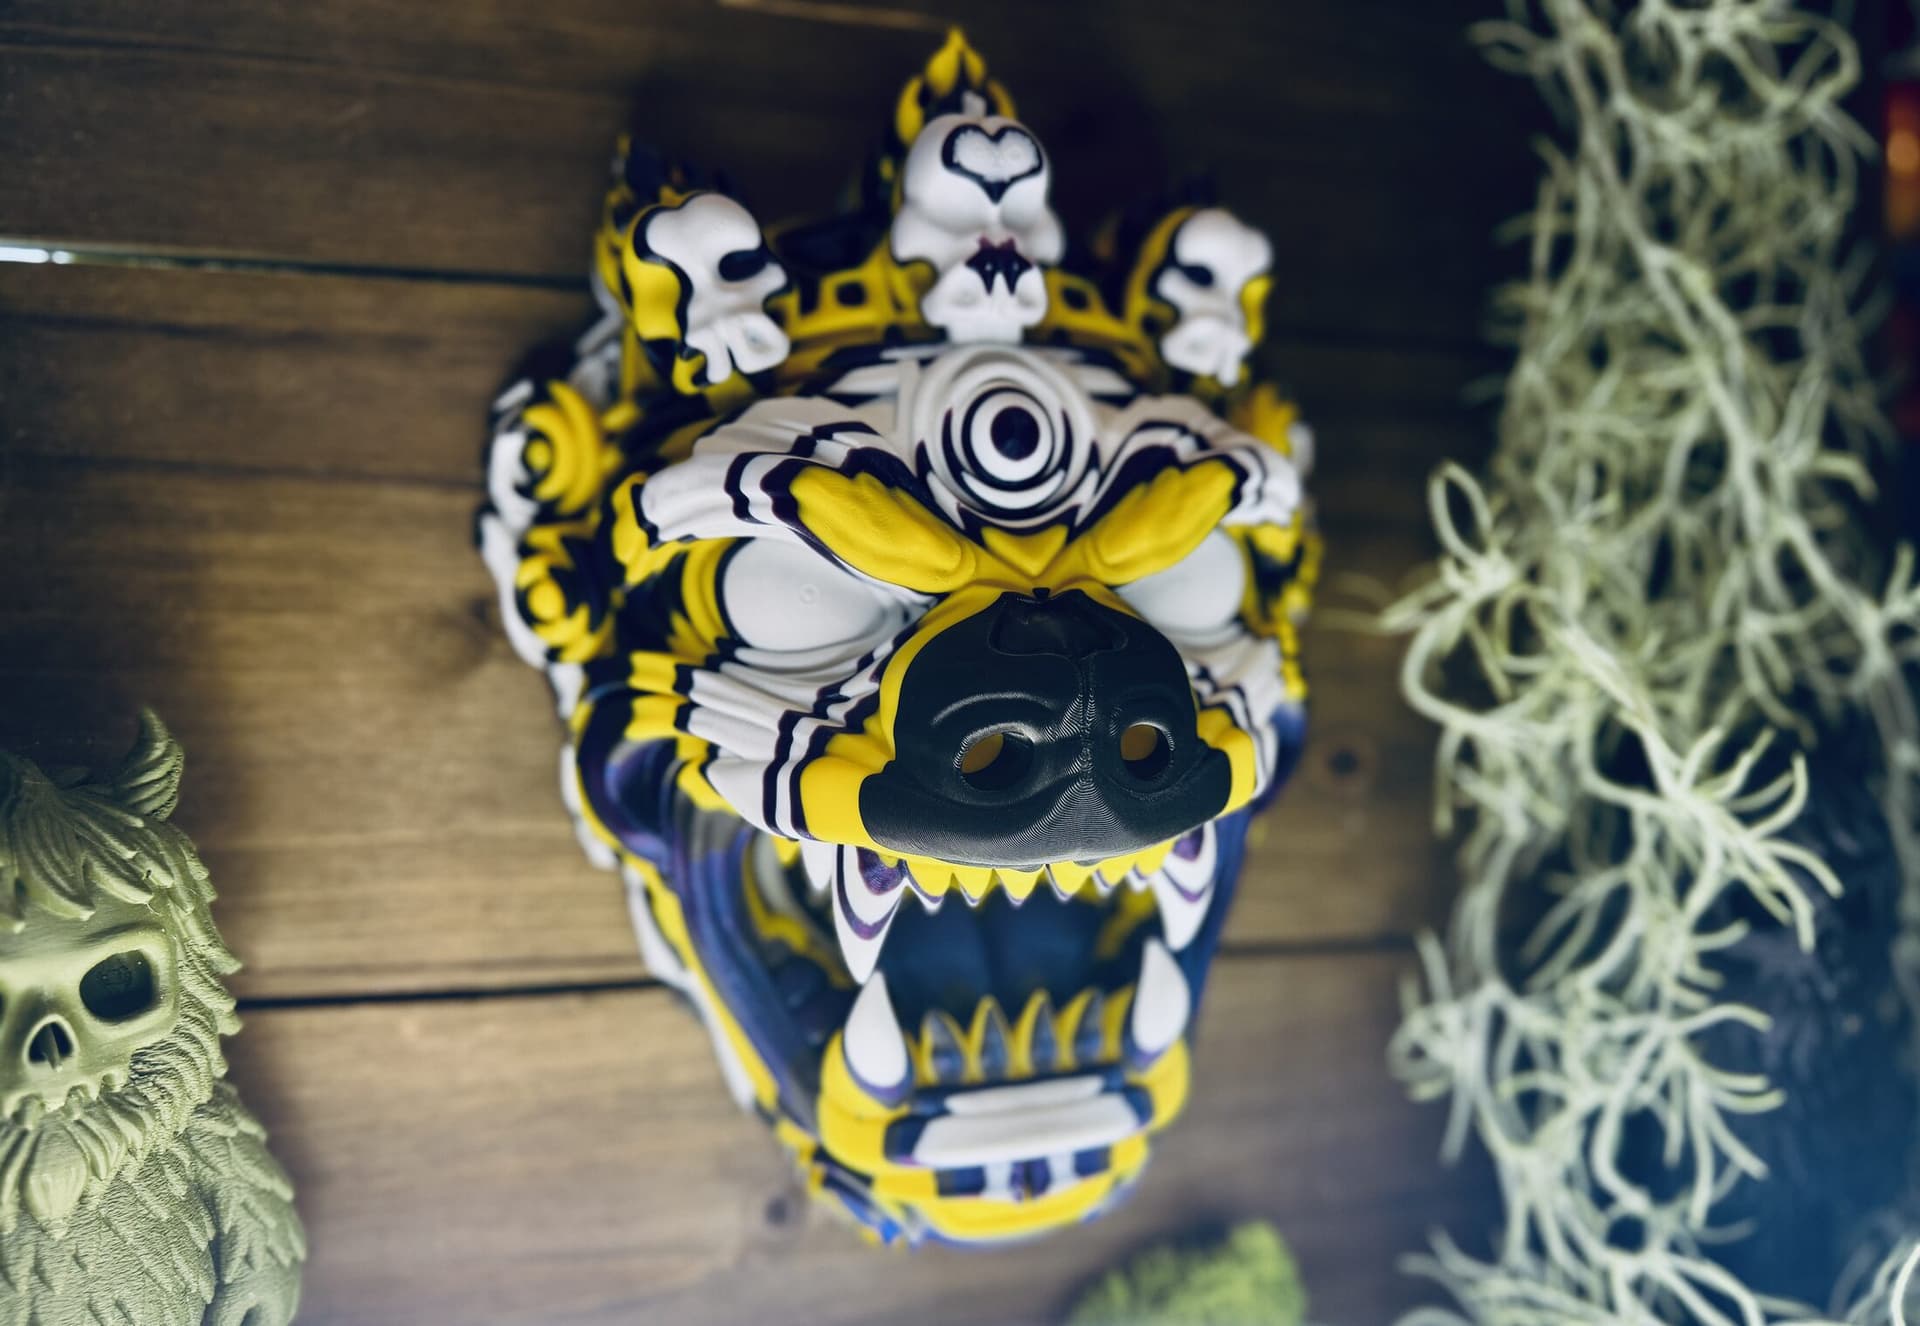
ColorStacking works by assigning different filament colors to specific height ranges across a model's surface. The geometry of the model — its ridges, grooves, and varying depths — determines where each color appears. Raised features reveal the top color while recessed areas expose layers beneath, creating natural contrast and shadow through the print itself.
The process starts with a focal point. Eyes, teeth, horns, a nose — whatever should draw the eye first. From that anchor, color bands radiate outward in concentric rings, moving up and down the Z-axis to follow the surface. The result is topographic: steep areas produce tight, thin color bands while flat surfaces get wider, thicker bands. It's like painting with elevation.
There are two ways to set up a ColorStack. The primary method uses the paint tool in Bambu Studio — painting color zones by height across the model. This is the preferred approach because it keeps things flexible: anyone printing the model can erase the suggested colors and create their own blend. The second method is hard-cutting the geometry into separate parts, each assigned a different filament. This produces cleaner horizontal color lines, but it's more permanent and takes away the easy customization that makes ColorStacking accessible.
What Makes It Different
ColorStacking shares some DNA with techniques like HueForge and filament painting, but it pushes into different territory. HueForge works by varying filament thickness to create images through light transmission — thinner areas let light through differently than thicker ones, producing a backlit lithophane-style effect. Filament painting assigns colors to specific faces on a model's surface mesh.
ColorStacking is sculptural. The depth and detail are carved into the geometry itself, and the color placement follows that geometry topographically. The same model printed in completely different color combos will look like a different piece of art each time — because the stacking responds to the surface, not a fixed image. The design intent lives in the model's shape, and the colors are the medium you interpret it through.
Design Principles
Every ColorStacked model is designed around a few core goals that go beyond just looking good.
Yours to customize
Every model ships with a suggested color setup, but it's just that — a suggestion. The paint tool approach is specifically chosen so you can erase, repaint, and make it your own. The best part of releasing these is seeing people take a design and run with it in directions that were never planned. A bear skull in earth tones. The same bear skull in neon psychedelic. Both right.
Minimal supports, maximum printability
Every model is designed to print with as few supports as possible, targeting overhangs under 30°. Supports leave marks, add waste, and make multi-color prints more complicated. Designing around them from the start means the print comes off the bed clean and ready — no cleanup, no post-processing.
Low waste, fast prints
Multi-color prints have a reputation for wasting filament and taking forever. ColorStacking is designed to minimize both. Color swaps happen between height ranges, not constantly mid-layer, which keeps purge waste low. Combined with optimized speed settings and efficient infill, these prints are faster and more material-efficient than most people expect from multi-color work.
Choosing Colors
There's no single formula — the right palette depends on the subject and the mood you want. But there are patterns that consistently work.
Want to skip the guesswork? Patron models come pre-ColorStacked and ready to print — just pick your filament colors and hit start. See what's in the vault →
Print Settings
ColorStacking doesn't require exotic settings. These are the defaults used for every Unicorn Graveyard model.
Layer Height
0.16mm. Balances detail with print speed. No adaptive layer height — it adds too much time without meaningful benefit for ColorStacking.
Infill
5% gyroid. These are decorative wall pieces, not structural — minimal infill keeps prints fast and light.
Speed
Optimized / standard Bambu speed settings. No reason to slow down — the technique doesn't benefit from reduced speed.
Nozzle
Standard 0.4mm. Nothing exotic needed.
Material
PLA. Predictable, available everywhere, holds detail well. PETG works too.
Supports
Minimal to none. Models are designed with overhangs under 30° so they print clean without support material.
What Printers Work?
- •Optimized for Bambu Lab printers with AMS (X1C, P1S, A1) — load the filaments, start the print, done
- •Works on any FDM printer with multi-color capability (Prusa MMU, Palette, manual filament swap)
- •The paint tool method means you can adjust colors in Bambu Studio before printing — no need to commit to the suggested palette
Gallery

Try It Yourself
Every Unicorn Graveyard model on MakerWorld is free for personal use. Grab one, load the filaments, and see the technique in action — or design your own patterns in The Forge.